

DfG Professional
What is the ‘DfG Professional’?
The ‘DfG Professional’ consists of three separate administration sites for Crane partners:
- The consent management dashboard (for managing consents)
- The confidential computing platform (for running privacy-preserving calculations and analysis).
- My Health Enabler for Health Care Professionals – a separate Journl app
1) Analysis through Confidential Computing & Consent Management
2) Data Catalogues available in the DfG platform
3) MHE for HCP – My Health Enabler for Health Care Professional
Analysis through Confidential Computing & Consent Management
How to securely combine data from individual citizens across multiple sources while ensuring both data integrity and privacy – while keeping your data secured, transparent and fully enabled.
In the following, you’ll see step by step how to set up an analysis.
- First, how to set up the query form
- Second, setting up the consent request
- Third, preparing for confidential storing and computation
- And finally, initiate the analysis and get the result
OBSERVE: THIS TOOL IS TO BE USED BY PROFESSIONAL DATA RESEARCHERS AND ANALYSTS
")
Step 1
Go to the “Analysis” menu
To do an analysis you start by setting up the ‘QUERY’ (defining which data you want to analyze how).
Setting up the query


Select ‘+ Create’
- Fill out Name of the Analysis
- Select data from the Data Catalogue (ExternalServices and ServiceProviders)
- Select which Data Sources you wish to use (in this case Fitbit and MySmaCa)
- You can fill out a note for the analysis (optional)guide
Select ‘+ Add calculation’
- Go to ‘Filter’ You now have the option to set Filters for the analysis.
- In this case write ‘b’ for body weight and enter a value – for instance > 90
Select ‘+ Add function’
- Select variable – for instance you can write ‘m’ for mean of (in brackets); ‘b’ body weight
- You can add more filters and functions by clicking on the ‘square with +’ in the right side next to the first filter or function
- Then you can edit the Filter value – for instance write body weight < 90 and Function ‘m’ for max of (in brackets); ‘s’ steps average
- When you have completed your query you need to click Send for approval*
- Confirm that you have finished by clicking Send
*The process will be that an analysis query will be sent to DfG for approval according to the DfG governance model.
Once the query is defined, the analyst must create and publish a consent request for citizens to accept in their DfG Personal app in order to share their data for the analysis.
IMPORTANT – You must now go to STEP 2 – setting up the consent
Step 2
Setting up the content
Login to the Consent Management (part of the DfG Professional platform)
- Start creating a new consent request by clicking on the ‘+’ in the upper right side
- Next you have to ‘choose an analysis’ in the dropdown list. Choose the analysis from the list that you have published
- Insert a title for your Consent request
- Insert the text you want to be presented to the citizens for them to give consent (compliance, data and purpose).
- You also have the option to insert a logo that will be presented together with the text for the citizens in DfG Personal. (optional)
- Once you are satisfied with your consent request you click on ‘Publish’


Step 3
Initiating/preparing the Virtual Data Lake for the Confidential Computation
Go back to the Analysis menu of DfG Professional
- When your query has been published the status will change to ‘collecting data’
- In the Consent admin dashboard, you can see how many citizens have accepted your consent request; ‘Users consented’
Now your consent request will be published in DfG Personal to the citizens meeting your criteria and having accepted to receive analysis requests (in the profile section in DfG Personal).
Once the citizen accept the consent, the requested data is being secretly shared (creating a Virtual Data Lake) in order to be ‘ready’ for the actual computation. Meaning the relevant citizen data will be secretly shared on the servers running a node in our MPC system – The Virtual Data Lake
Step 4
Doing the analysis and getting the result
- Once the Analyst/Researcher is satisfied with the number of participants (number of consents by qualified citizens), click ‘Start calculation’- and ‘Confirm’ you want to start in the popup box (point of no return).
- Now the computation is carried out and once finished, a new button will appear with Computation complete.
- Click on the button to view the result


Data Catalogues available in the DfG platform
Here you will be able to see a list of Data Catalogues available in the DfG platform. This will be further developed during the Pilot and through co-creation
MySmaCa by Meteda
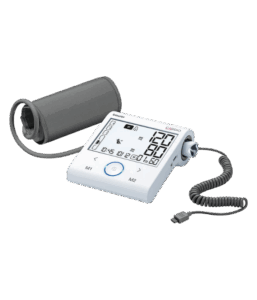
Beurer BM96
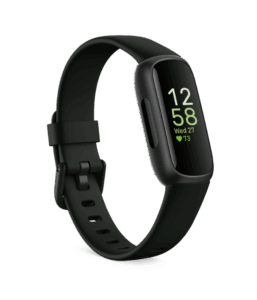
Fitbit Inspire 3
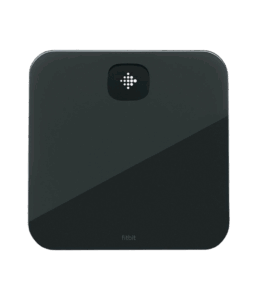
Fitbit Aria Air
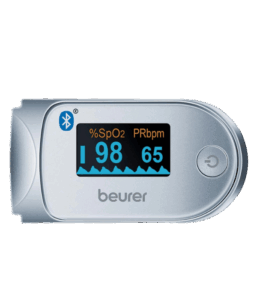
Beurer Po60
MHE for HCP – My Health Enabler for Health Care Professional
What is “Journl”?
The Journl application gives healthcare professionals access to their patients’ health data. This allows healthcare professionals to stay informed about their patient and continue with treatments.
Log in as a first-time user
Log in as a first-time user
1. Open the Journl app

2. Select the “Clinician login”

3. Select “Crane” as project from the drop-down menu
4. Enter the test user credentials in the username/password fields provided to you in advance
5. Press “Log in”
Once you have logged in, you will be presented with two main. menus: Citizens and More, located at the bottom of the screen.

Explore the Citizen menu
The Citizens menu displays a list of your connected patients
Connect a Citizen
1. A list of citizens displayed with the citizen’s name and a unique ID

2. To view a citizen’s data, locate the citizen in the list and select by tapping the citizen’s gray box
3. The citizen’s data, such as vital parameters, is displayed along with the date of each measurement

4. Click on the arrow icon in the upper left corner to navigate back to the full list of all citizens
Log out
To log out of the app, go to ”More” in the menu bar, then click on “Profile and login” and click “Log out”.

